Hot water is a necessity in every household, and the hot water heater is an essential appliance that ensures you have a reliable supply of hot water. However, sometimes the pilot light on your hot water heater may go out, leaving you without hot water. Fortunately, relighting the pilot light is a relatively easy process that you can do yourself. In this guide, we will take you through the steps on how to light a pilot light on your hot water heater.
Safety Precautions Before Lighting a Pilot Light
Before attempting to light the pilot light on your hot water heater, it is crucial to take the necessary safety precautions.
First, ensure that the area around the hot water heater is clear of any combustible materials such as cleaning supplies, paper, or rags. Also, make sure there is adequate ventilation in the room to prevent the buildup of gas.
Next, turn off the power supply to the hot water heater to prevent any electrical accidents. You can do this by switching off the circuit breaker or unplugging the heater from the power outlet.
Lastly, if you smell gas or suspect a gas leak, do not attempt to light the pilot light. Evacuate the area immediately and contact your gas company or a professional plumber.
Identify the Location of the Pilot Light and Gas Valve
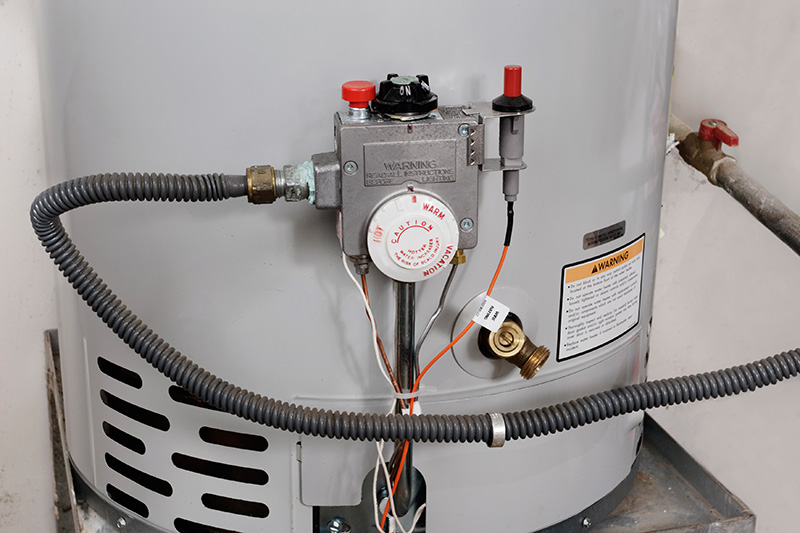
The next step is to locate the pilot light and gas valve on your hot water heater. The pilot light is a small flame that burns constantly and ignites the gas burner when you turn on the hot water tap. It is usually located near the bottom of the tank and can be identified by a small metal tube leading to it. The gas valve controls the flow of gas to the burner and is usually located near the bottom of the tank. It is essential to know the location of the gas valve so that you can turn off the gas supply before lighting the pilot light.
Turn Off the Gas Supply
Before lighting the pilot light, turn off the gas supply to the hot water heater. You can do this by turning the gas valve to the “off” position. It is crucial to wait for a few minutes to allow any remaining gas to dissipate before attempting to light the pilot light.
Wait for Gas to Dissipate
After turning off the gas supply, wait for a few minutes to allow any remaining gas to dissipate. This step is crucial to ensure that there is no gas buildup that could cause an explosion when you light the pilot light.
Lighting the Pilot Light
Now that you have taken the necessary safety precautions and located the pilot light and gas valve, you can proceed to light the pilot light. Here are the steps to follow:
- Turn the gas valve to the “pilot” position.
- Hold down the pilot light button and use a long match or lighter to ignite the pilot light.
- Continue holding down the pilot light button for about a minute to allow the thermocouple to heat up.
- Release the pilot light button and turn the gas valve to the “on” position.
If the pilot light goes out after releasing the button or turning the valve to the “on” position, repeat the process, holding down the pilot light button for a longer period.
Contact Walley Plumbing Company
If you have followed all the steps and the pilot light still won’t light, it might be an indication of a more severe problem with the hot water heater. In such a case, it is best to contact a professional plumber to diagnose and fix the issue.
In conclusion, relighting the pilot light on your hot water heater is a straightforward process that you can do yourself. However, it is crucial to take the necessary safety precautions and follow the steps carefully to avoid accidents. If you encounter any difficulties or suspect a gas leak, do not hesitate to contact a professional plumber.